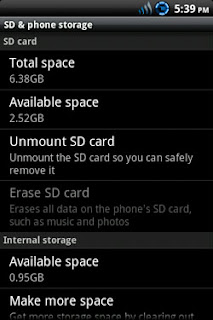
This is my last tutorial article that discusses about HTC Wildfire S. In this tutorial, will be explained more how to install the Custom ROM. In two discussions on Wildfire S (WFS) before, namely about how to Unlock Bootloader and Root WFS. Now is the time on how to optimize this Smartphone. So Internal Storage can much relieved, and UI look more awesome.
There are some Custom ROM recommended by some of Developer. Among Cynogenmod and Jikantaru XE ROM. But I will not explain all the ROM but only Jikantaru ROM XE. You can consider from the cool side of the UI as well as some optimization features. Okay before I guided step by step, it may be helps if i show results of Installing Custom ROMs Jikantaru XE ROM first.


In this tutorial I assume that all of you has already made the two previous stages, the Unlock Bootloader and Root HTC Wildfire S. So, no need to prepare a lot of things anymore. you just need Only required file JikantaruROM XE Custom ROM.
DOWNLOAD JIKANTARU : Download here
There are some Custom ROM recommended by some of Developer. Among Cynogenmod and Jikantaru XE ROM. But I will not explain all the ROM but only Jikantaru ROM XE. You can consider from the cool side of the UI as well as some optimization features. Okay before I guided step by step, it may be helps if i show results of Installing Custom ROMs Jikantaru XE ROM first.


In this tutorial I assume that all of you has already made the two previous stages, the Unlock Bootloader and Root HTC Wildfire S. So, no need to prepare a lot of things anymore. you just need Only required file JikantaruROM XE Custom ROM.
READ FIRST
- To do this tutorial you must have root your phone, read how to root htc wildfire s
- You must have Unlock the Bootloader
- It should be noted before installing custom ROM, it will be better make nandroid backup ( bakcup the ROM Default first.) Just in case if you want to revert to the original ROM.
- Okay, time to start the ROM installation phase.
DOWNLOAD JIKANTARU : Download here
Tutorial Install Jikantaru Rom On Wildfire S
- Keep in mind, in order to install this Custom ROM, requires a memory partition. There are many ways you can do. Most use "Mini Tool Partition." But I think it is less effective and according to some sources sometimes partitions using this tool can be lost so that the application installed on the SD card can be error. In these applications base on Windows, whereas Android is Linux. So in my opinion is safer to use CWM Recovery that also base on Linux, partitions is more easily, quickly, and accurately. If you want to use SD or memory capacity, choose a good quality.
- How to make partition: first go into HBOOT by
turn off your phone, remove the battery and reinsert it. Press the Volume Down button followed by Power (Volume Down + Power). - Once logged in HBOOT. Pick parts that go into CWM Recovery Recovery.
- Once inside the CWM Recovery. Choose Wipe Data / factory reset.

- After completion select Wipe cache partition.
- Select the Advanced tab.
- In this section, select Wipe Dalvik, then Format SD card. Format SD card to make it really clean so could be perfect partition. Partitioning can be done in many ways. It is up to use which method.

- After the SD card Format process completed, its partition time. Since I use 2 GB SD capacity. Then I will make partition into two (2). The first partition to EXT2 format applications, the second partition for storage, let the rest for cache memory.
- Choose Partition SD Card, then I fill the first 500MB partition, then select o.
- After partitioning is completed next install the downloaded ROM. Copy the ROM by going to mounts and storage. after the drive appear, copy the ROM file into the partition that you have made. then Unmount back.
- The last step select Install zip from SDCARD. Select the copied ROM file and wait.
- Once the process is complete, do the boot. Congratulations you have successfully installed a custom ROM.
Ok, that for tutorial today on How install Custom rom on HTC Wildfire s, which is this time use jikantaru ROM. i hope it helps you. please comment if you want to ask me.
Comments
Post a Comment