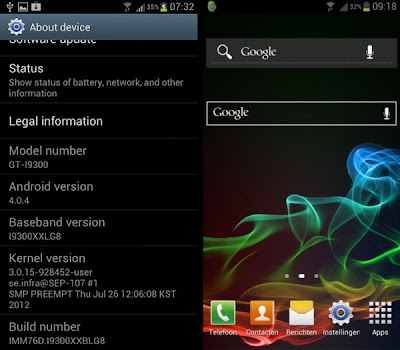
Yesterday i have post about the release of galaxy s 3 firmware XXBLG8 update. although Just one day ago Samsung released the XXBLG6 Android 4.0.4 firmware update for the Galaxy S3 in the UK, but now samsung release again this firmware update because on the XXBLG6 firmware the search feature is removed. They say if that is an accident, so they replaced it again.

If your galaxy s3 firmware is XXBLG6 or maybe the another version just simply check in Settings » About, on there you can check your firmware version. you can flash your galaxy s3 to the XXBLG8 firmware by following the tutorial below. XXBLG8 is the latest firmware that released by samsung. so you can update to it, it doesn't matter in which country you are now. And now the galaxy s3 users can enjoy again the search feature. on this post you can update your galaxy s3 fimrware to XXBLG8
Compatibility
This tutorial below are compatible only with the international Galaxy S3, model number i9300. It’s not compatible with the US variants or other devices. ypu can check in: Settings » About phone.
Read First
Do With Your Own Risk
How to Update Galaxy S3 to XXBLG8 Android 4.0.4 Firmware
- Back up your important data on your phone. you don't need to back up your SD card data because on that place is always safe. so just bcak up apps and data on your phone.
- Download and install Kies software on your computer, this install the necessary drivers for your phone.
- Download the firmware.
- Then extract the zip file file that you have downloaded above on the computer. aftrer extracted you will find a file named I9300XXBLG8_I9300OXABLG8_I9300XXLG8_HOME.tar.md5.
- Download the Odin. Odin is a tools that used to flash stuff – firmware, kernels, etc. – on Samsung phones. We’ll use Odin to flash the firmware file obtained in step 4. to download odin you can go this post. download latest odin.
- Extract the contents of the Odin file above to a folder on your computer.
- Now, turn off your Galaxy S3.
- Then, change your galaxy s3 into download mode. To do that, press and hold Volume Down + Home + Power together till the screen turns on. Then press Volume Up to enter download mode.
- Open Odin the Odin3 v3.04.exe. the file that you get from step 6.
- Please Notice! Connect your phone to PC now, you can use your USB data cable. You should get the message “Added” on the Odin’s message box in the bottom left.If you don’t found this message, make sure you installed drivers correctly (using Kies or directly download) as i given in step 1. If it still doesn’t work, try changing to another USB port.
- Then Click on the PDA button in Odin, then browse select the I9300XXBLG8_I9300OXABLG8_I9300XXLG8_HOME.tar.md5 file that you can get in step 4 above.
- Please Notice! Do not make any other changes in Odin except selecting the required files as given in step 11. and one again please don't check the box on Re-Partition check box.
- Now, click the Start button to start flashing the firmware on your phone.
- When the flashing process completed, you’ll get a PASS message (with green background). the position is in the left-most box at the top of the Odin, and the phone will automatically reboot.And When you see the Samsung logo appear, you can safely unplug the cable.
- Please Notice!. if ODIN gets stuck on setup connection or at any stage of the flash process after click the Start button, and its seem to be doing the process, or if after the process of the flash completed you get a FAIL message (with red background).do this instruction:disconnect your galaxy s3 from PC, close ODIN, remove battery for 4-5 seconds, then re-insert it again, then make you galaxy s3 to enter Download mode again, and do the procedure again from Step 9.
- After you get the PASS message and then your galaxy s3 reboots, the phone maybe will get stuck at the booting animation. If that really happens, do the following tutorial to make it boot. please Remember that these steps will wipe your all personal data. If your phone has already booted, skip these steps, because your galaxy s3 firmware has been updated successfully:- Boot to recovery mode. to do so, first power off your device (by removing battery and reinserting it), wait approximately for 5-6 seconds, and then press and hold Home + Volume Up + Power keys together till your phone turns on, then let them go to boot into recovery. after you have enter in recovery mode, use volume keys to move the selection up and down and home/power key to select the option.- Then go to Wipe data/Factory Reset, then select it. Select Yes on next screen.- Then, go to Wipe Cache and select it. on the next screen Confirm Yes.- Then, select reboot system now to reboot your device, and now your phone will boot properly.
Finish, now Your Galaxy S3 is running with the XXBLG6 Android 4.0.4 firmware. just comment if you want to ask anything.
Comments
Post a Comment