Google have announced that Android 4.1 Jelly Bean at Google I/O 2012 last week - To know how to install jelly bean to your galaxy nexus please read carefuly this article - , it will take time for a Verizon to officially release Jelly Bean for the Galaxy Nexus, but users who are willing to do some work can try out Android 4.1 today. Now Android 4.1 Jelly Bean are available for Galaxy Nexus. And In this post i will give tutorial how to install Jelly Bean on Galaxy Nexus. This version of android is working for 4g, LTE, WiFi, MMS, SMS and another features that users would expect.
There are 5 Android 4.1 Jelly Bean feature that most reviewed
- Resizable WidgetsThe First feature that will make the users impressed is the widgets, widgets can automatically re-size on the home screen. Widgets can re-size themselves around different widgets to avoid wasting area on the screen. Users will be ready to manage the dimensions of the widgets themselves furthermore
- New Notification FeaturesGoogle has added some pretty features for Notifications on android Jelly Bean. Notifications are currently customizable and that they can also expand and collapse.
- Offline Voice TypingFor people who utilize their Android device as some way to dictate, things simply got a full ton easier. With Jelly Bean, users are going to be able to speak into the microphone and also the software can record everything everything that the user says.
- Voice SearchAndroid 4.1 Jelly Bean gives you a powerfull new Voice Search tool that uses data Graph to tug search results. there's a replacement UI and also the service is far faster than it's ever been.
- Google NowGoogle now could be a vicinity of the overhauled search expertise and it'll use the actions of Android users to work out what they need. Google provided specific examples together with scheduling events, flights and transportation.
read more Android jelly bean new features
Before you begin, it is very important to create a backup of your Galaxy Nexus. Because After unlocking the boot loader, it will erase all data of your phone permanently!
Install Android 4.1 Jelly Bean on the Verizon Galaxy Nexus
Then downoad This file :
the Vicious JellyBean V3 ROM
the Trinity Beta JB Kernel - Under Experimental Tab
the Vicious JellyBean V3 ROM
the Trinity Beta JB Kernel - Under Experimental Tab
to install it you need to have super user acces(you have rooted your galaxy nexus). for users that have rooted it can see the tutorial root and unlock galaxy nexus
After you have root and unlock your galaxy nexus, backup your device, you can use ClockWorkmod(CWM) recovery, install CWM from Google play
Make Nandroid backup
to backup, first Choose Backup and Restore
then press Power to select backup.
then Wait while your device creates a backup.
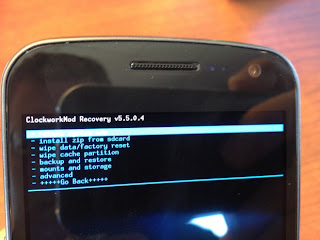
Wipe the Galaxy Nexus
Use the volume buttons to highlight wipe data/factory reset.
Press the power button to select it, and then highlight the Yes option on the next screen using the volume buttons and then power to select again.
When the wipe is complete, select Go Back.
Now, highlight wipe cache partition and select it.
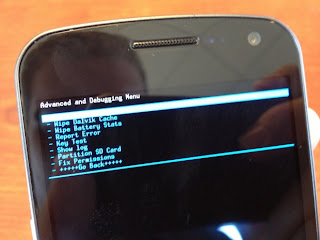
Select Advanced and then select Wipe Dalvik Cache.
Choose Mounts and Storage and then
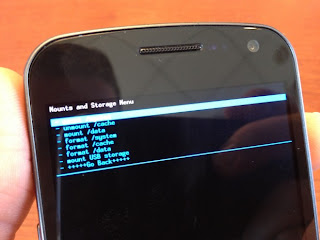
Then Select Format System, allow the process to run.
Format Data, allow the process to run.
Format Cache, allow the process to run.
Tutorial Install Jelly Bean Android 4.1 on Verizon Galaxy Nexus
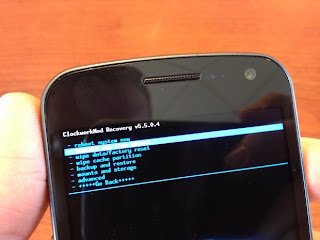
Go back to the main Recovery screen.
Select Install Zip from SDcard.
Select the ROM that you have download at the start of this guide, usually found under the Download folder.
Then Highlight the Vicious-TORO-JellyBean-V3-signed.zip ROM and then select it with use the power button.
Flash the New Kernel
to flash it, Choose Install Zip from SDcard again.
Select the kernel downloaded at the beginning of this guide and install it using the power button.
FINISH Install Android 4.1 Jelly Bean
When the phone reboots it should your Galaxy Nexus have been installed with Android 4.1 Jelly Bean. The phone may take a very long time to boot, mine took 5 or so minutes.
FINISH.. thats it for install jelly bean on galaxy nexus
please comment to ask anything
see you in another tutorial for android
Very thorough .... thanks .. let's see if I get brave this weekend :)
ReplyDeleteOkay, you're welcome :)
ReplyDelete